There are two steps that everyone and anyone will want to watch. One is applying the first coat of finish to see the wood grains pop for the first time, and the other is the first pour of an epoxy/resin river. It is very cool to see the formation of a table come to life.
There are several tools/odds and ends you’ll need during your pour. Much like the tool list from Before the Pour Part 1, I’ll have everything I use listed with links at the bottom of this post.
We should still have our plastic on the floor from our edge seal. If not, this would be the time to cover the floor of your working area. It is inevitable you’ll have a leak (even the pros have leaks from time to time), do yourself a favor and save tons of time and cover the floor. There are some shops that have dedicated areas for epoxy pours, where they have made a permanent, sometimes environmentally controlled, watertight area for their pours. They are able to put their mold into these spaces and always have a clean environment. Unfortunately, I don’t have that type of space to dedicate so we end up making a mold and working in the center of the shop with plastic on the floor. It doesn’t have to be the greatest stuff on the market, I use 3mm and it works just fine for me.
It may sound like overkill, but I end up putting enough plastic down to allow me to walk comfortably around the mold and stay on the plastic. Add a set of plastic boot slip-on covers and use them when your working. You won’t have to worry about stepping into epoxy drips and tracking them around the shop. More on this and clean-up in an upcoming post.
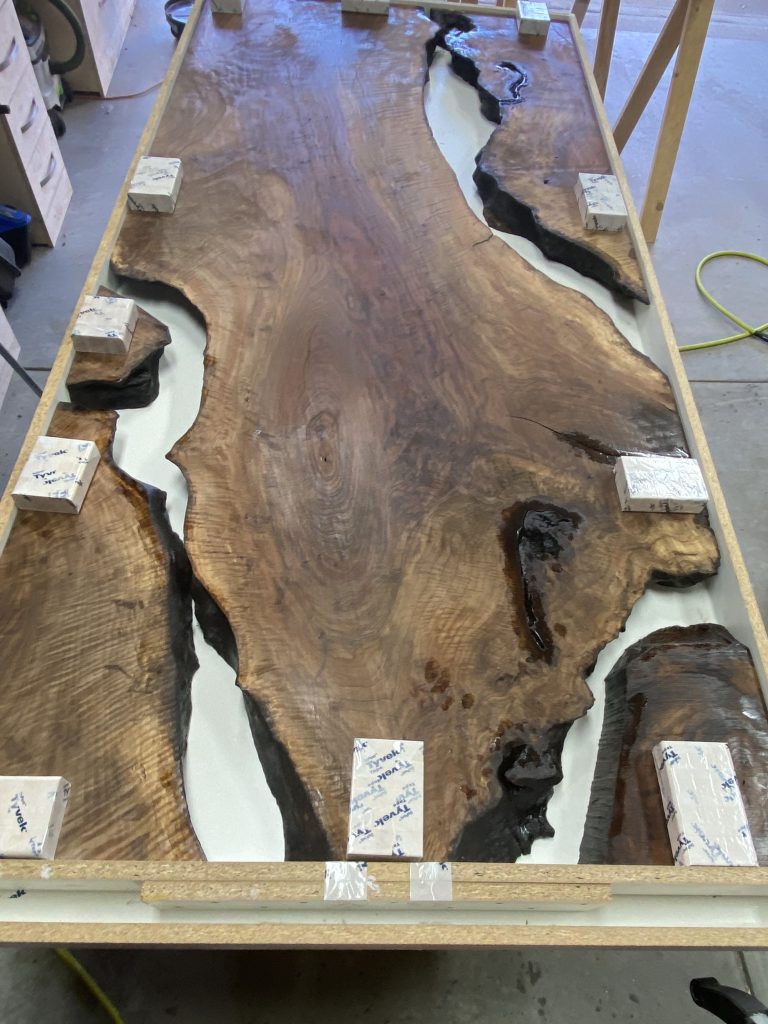
I mentioned the mold earlier, which may sound like a no-brainer to some and completely new to others. I’m considering writing a much deeper dive into molds and mold building down the line. Long story short, if you’re going to do a pour that brings the epoxy/resin to the edge, you need a water (epoxy) tight cavity to place your wood slab(s) in and eventually pour your epoxy into. These molds can be made out of any material. Some are used repeatedly, while others are a one-shot deal, and everything in between.
Once you have your mold constructed, you’ll need to figure out a comfortable working height for yourself and set your mold accordingly. Secondly, you need to consider airflow under the mold during the curing process. I know this doesn’t sound particularly important, however, you do need to control the heat produced by epoxy curing. Personally, I tried using my assembly table and added a few 3/4″ strips under the mold, but I find using my Kobalt saw horses on their lowest height (30″) works great. For this table, I used four horses to ensure the mold did not sag across the span. If you have a beam level, or use any standard level in several spots, make sure your mold is level on your support surface. If you are working in a garage, the floor may appear level but are designed for water to flow out, away from the structure. You’ll need at least one 1/8″ shims on an eight-foot table to level it out.
The last thing about the mold, if your material does not naturally lend itself as a release barrier (polypropylene), you need to use some form of mold release agent. Planing, cutting, or sanding your mold off your piece is no fun. You can use a house wrap tape or some form of aerosol application. Again, it’s less about what product is used rather than if you should use one.
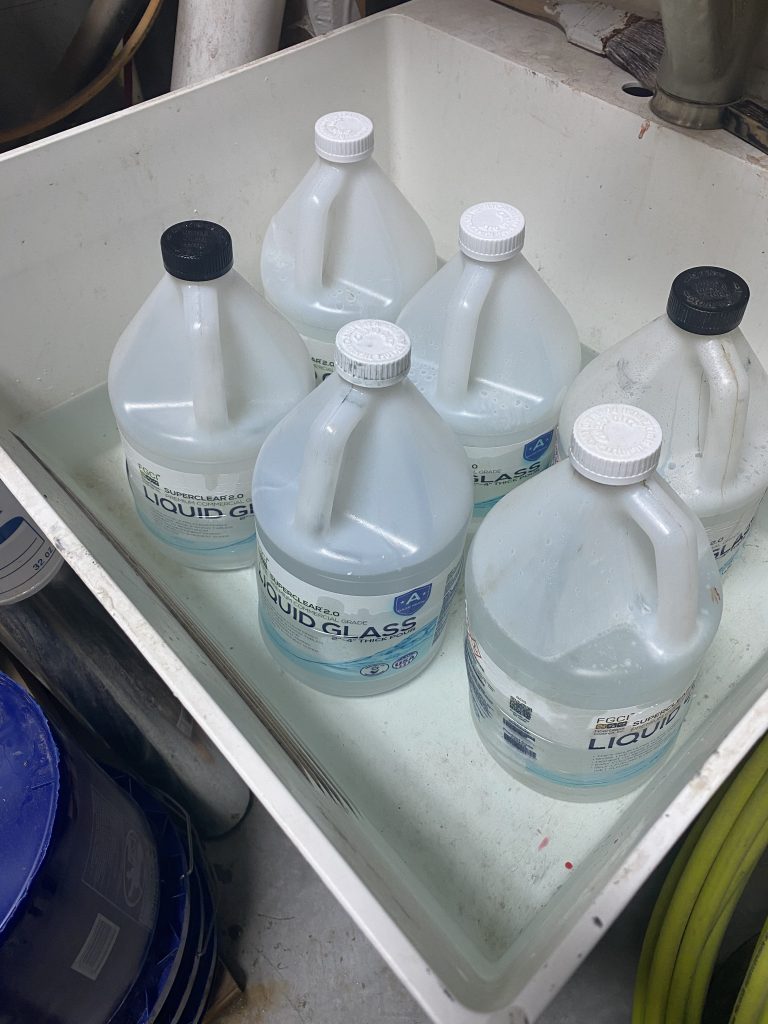
Time to warm up your epoxy in a water bath. The kitchen sink works well, a shop sink works better. Staci appreciates this much better too. There’s nothing that gets her spooled up like multiple gallon containers soaking in the kitchen while we’re trying to prep dinner. Even if you store your epoxy inside, you want to decrease the viscosity (or frictional force between the molecules of a liquid). In other words, you want your liquids to move smoothly, hence heating them up. You want to give this time, roughy an hour or so. Don’t be shy and worry about warming up too much epoxy. Better to have some warm and not used rather than scrambling during a pour to warm more up.
While the epoxy is warming up, get the rest of your odds and ends ready to go. If you are using epoxy that requires you to measure the ratios by weight, this is the time to grab out your scale and buckets. Quick tip: put your scale in a plastic, zip-lock style bag. For LiquidGlass there is no need to weigh it, the packaging is perfect for the work I’m currently doing. Open one box, warm it all up and you have 3 gallons of epoxy ready to roll. This also allows me to use any 5-gallon bucket which can be picked up from anywhere. We’ll get our paddle mixer, drill, and stick to scrape the sides, much like when we were doing the edges. We’ll need a propane torch, or plumbers torch, to pop any bubbles. I’ve seen and tried using a heat gun (not your wife’s hair drier, but an industrial heat source). It works well, but I prefer the propane torch. If you are going to be using any form of dye, or you are going to use box fans to help control the temperature, an infrared thermometer to monitor the temperature of the epoxy during the curing process, get all of that ready to go. Maybe you are estimating or perhaps if you’re unsure how much dye you will be adding, you may want to get a clear plastic “solo” style cup to see what the dye will look like once it is poured.
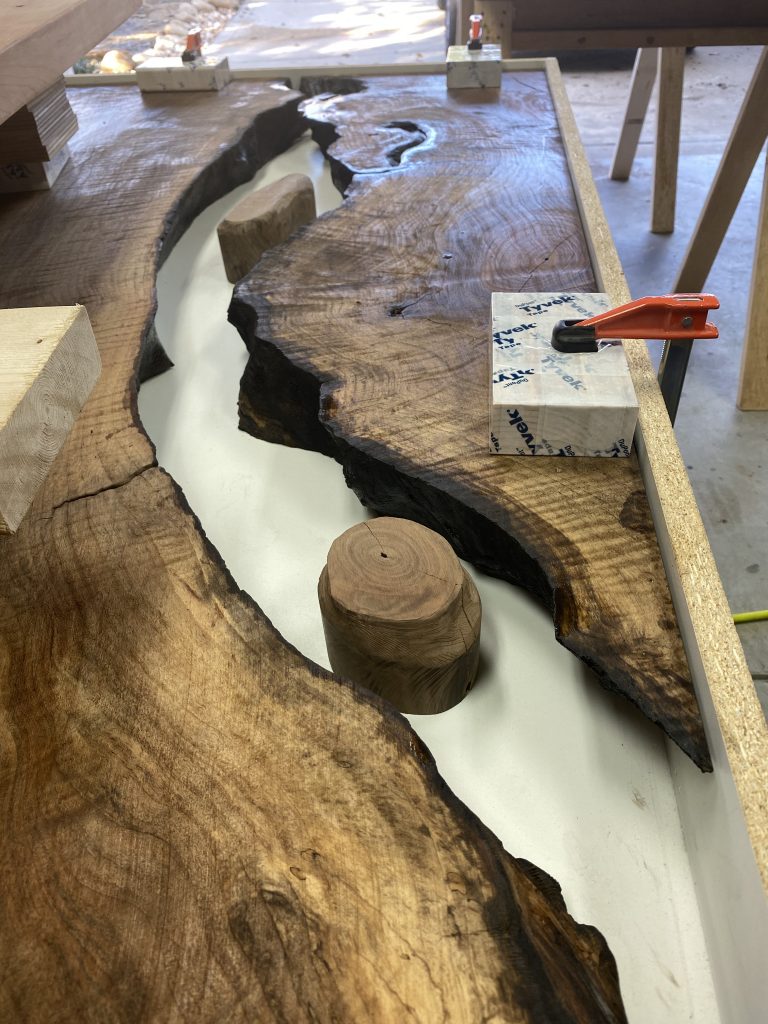
Lastly, you’re going to need clamps. Lots, and lots of clamps. These are going to get epoxy on them, so they need to hold pressure but don’t have to be the the most expensive parallel clamps on the market. You will also want to have some clamps on stand-by just encase you have a leak. I’ve been using F-clamps around the edge and Pipe clamps for the center, but more on this in a moment.
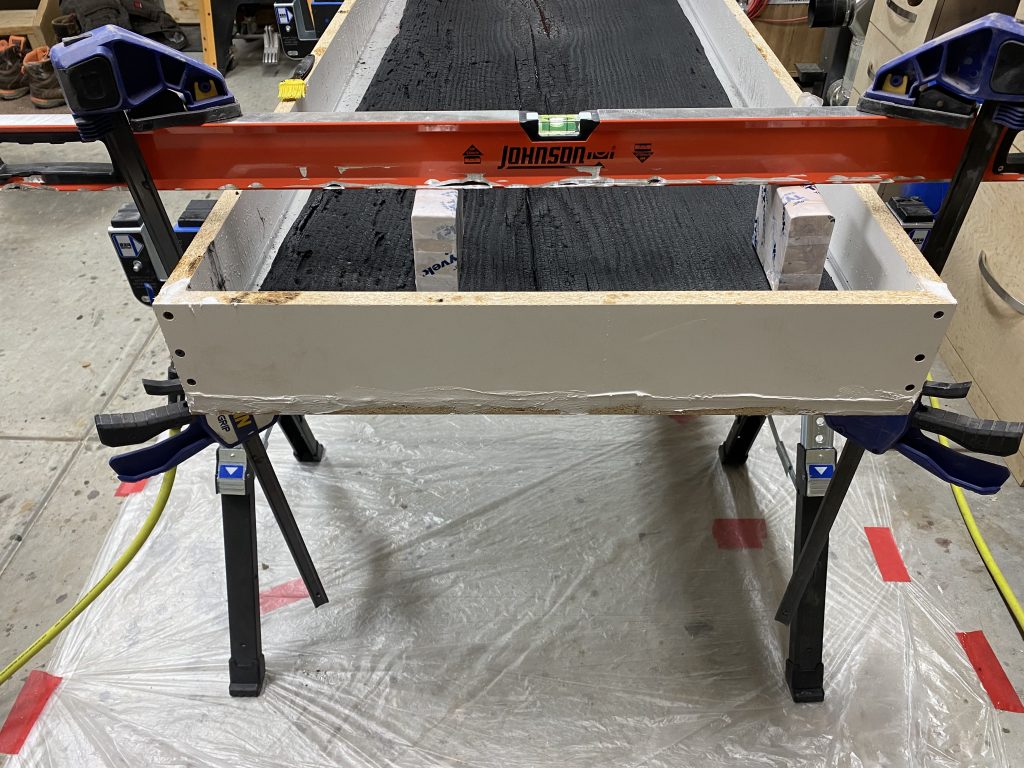
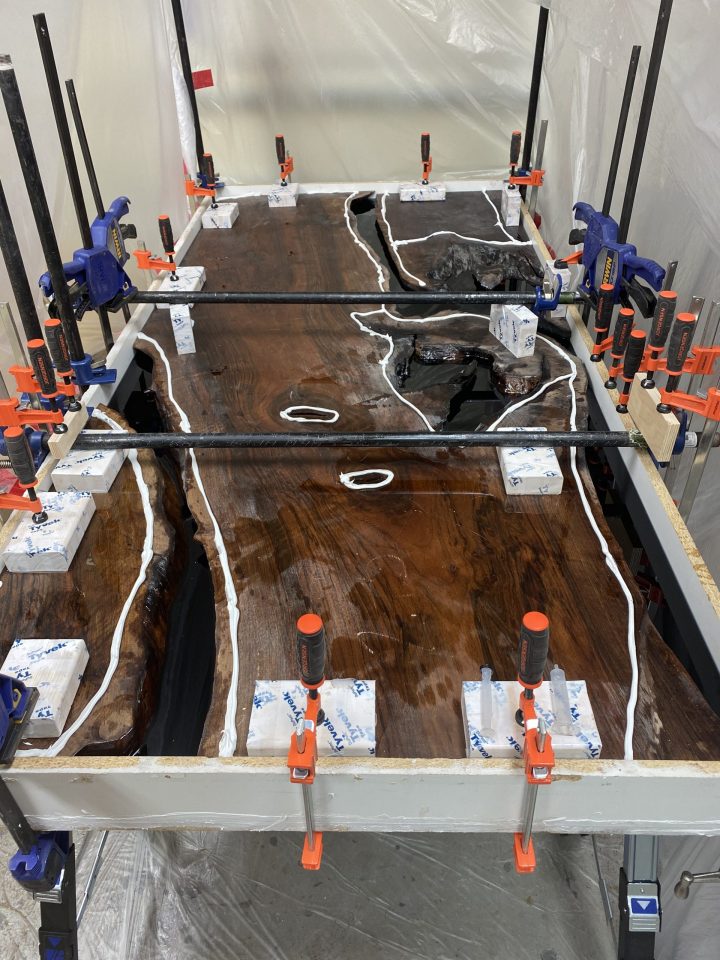
So what do we use clamps for anyway? As heavy as these slabs are, they are going to float in epoxy. Yes, you can add weight on top of the slabs, but it does not prevent the slabs from moving in the mold, nor provide distribution of downward force across the slab. I find it’s better to clamp everything down. I use off-cut 2x4s covered in house-wrap tape as my contact point with the slab. For the edges, the F-clamp makes contact with the bottom of the mold and the top of the 2×4. To provide pressure to the center or on an island, I place the 2x4s along the edge of the slab that forms the river or in the case of wide slabs, towards the center. I then place a second 2×4 or an aluminum level on top of these off-cuts, long enough to overhang the edges of the mold, and clamp these down.
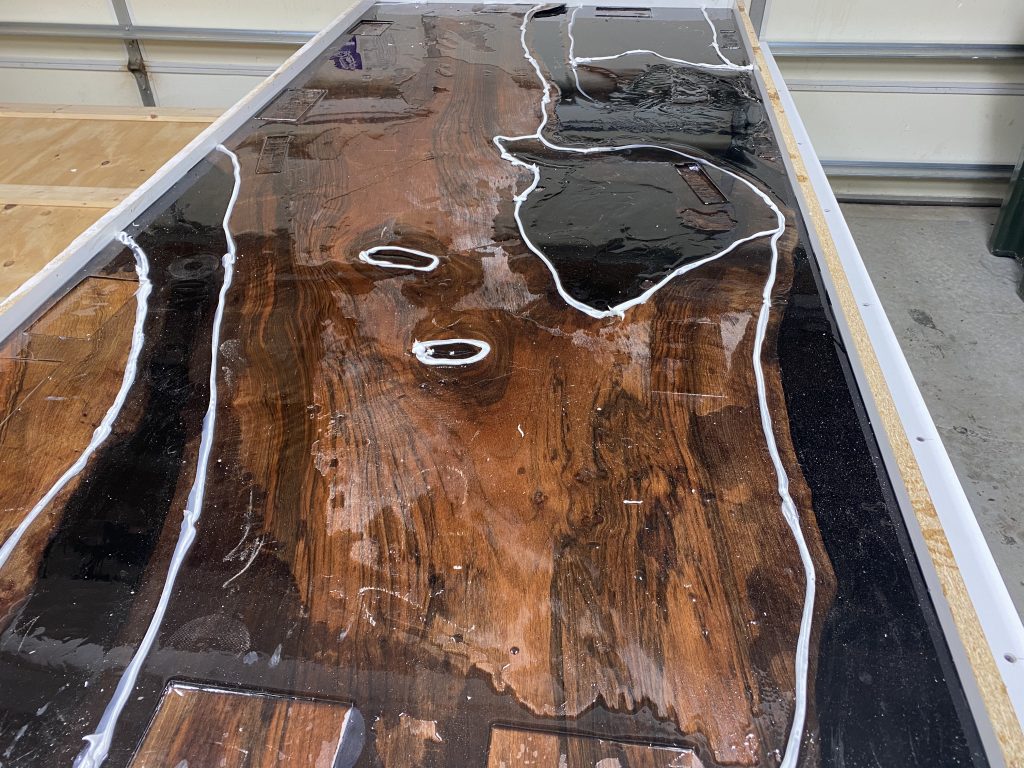
I’ve found myself experimenting with a silicone caulk dam lately. Some say it helps limit the quantity of overflow required to top off the river. Others say it causes more issues during the cleanup and sanding phases. Others still, argue the thickness of the finished table is always thinner than the edges of the river, therefore the edge of the slabs acts as a dam to prevent overflow. On my previous build, I did not use this dam method while I did create one here. For me, the jury is still out. I’m going to keep on experimenting with this technique. I believe it has more to do with the location and application on the slab rather than an all-or-nothing approach.
Finally, it’s time to mix. To help the epoxy mixture, I’ll pour in one container of Part A, half the container of Part B, the second container of Part A, and finally, the remainder of Part B. Just as before, try not to splash the epoxy out of the bucket and keep the paddle completely submerged to help prevent the introduction of more air bubbles. I’ll mix and scrape the sides twice, then add the dye for the final mix and scrape.
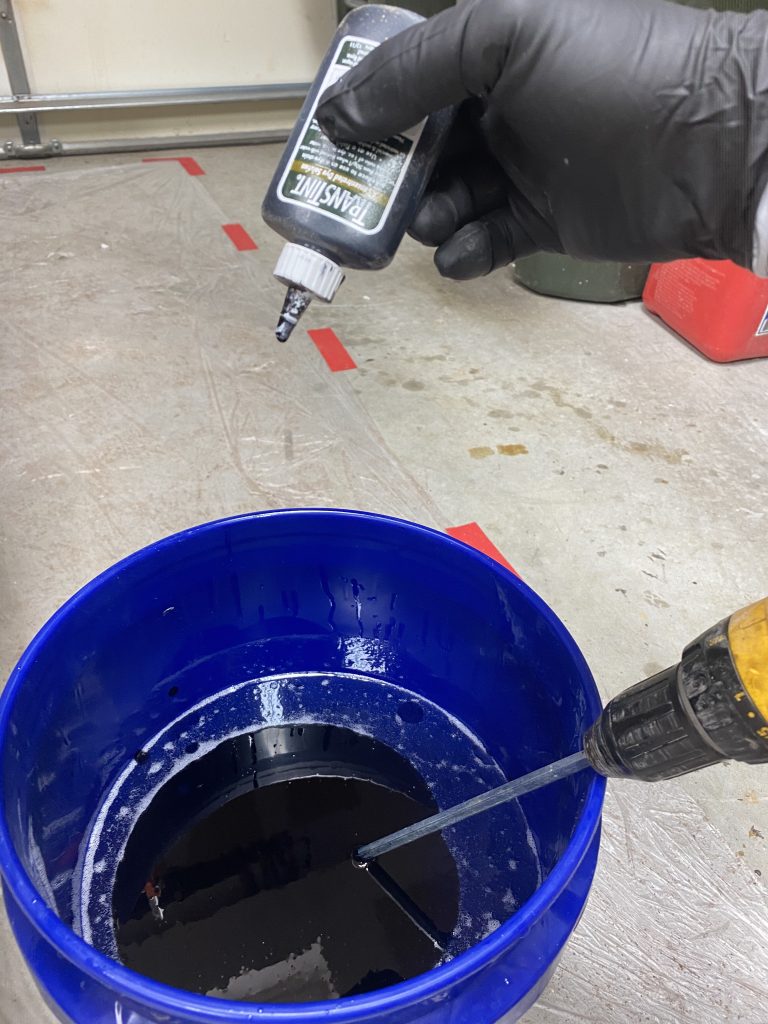
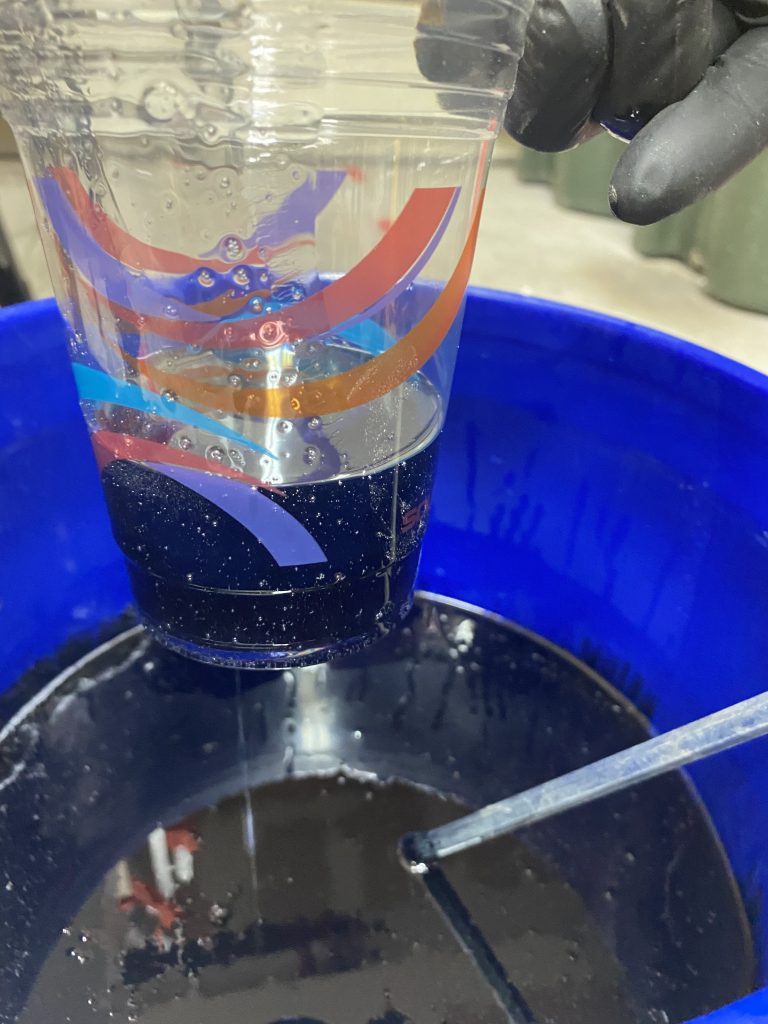
Since we’re using a solid, liquid dye here, it’s not critical we know exactly how much we will need before we add it. If we intended to use a dye or “pigment powder” to make a textured/colored look we would be better off experimenting beforehand with some water and the pigment to get the balance just right. For this table, we added the liquid dye slowly in order to count the number of drops we are putting in. Remember a little dye goes a long way. For this table I wanted it to barely be translucent when you are looking right over it, but look like it’s solid black from a distance. For 3 gallons of epoxy, I started with 10 drops and mixed, added 5 drops at a time, and continued to mix until I got what I was looking for. Use your clear plastic “solo” cup and measure from the bottom to the intended thickness of your table. Make a sharpie line on the cup. Dip the cup into the epoxy and fill it to the line. Naturally, you’ll want to look sideways, however, look down. This provides you an indication of the desired transparency of your mix. As a general best practice, I hold the cup of the epoxy mix over the working piece and see how transparent it is over the wood and the mold.
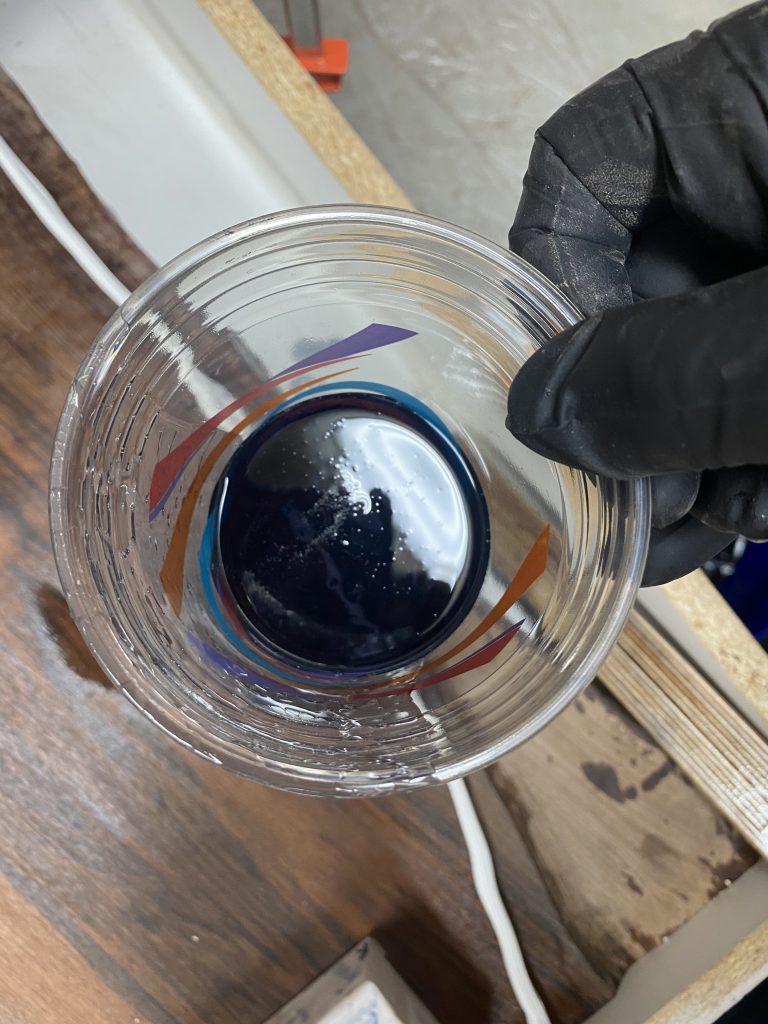
Once everything is mixed to your liking, let it sit for 15 minutes. This allows any micro-bubbles to form and float to the top of the bucket. After time is up, use your torch to pop these bubbles. This also ensures the torch is ready when you need it coming up. One last check of the clamps, the mold, the epoxy, etc. and you are ready to go. Try to pour your epoxy into the rivers in several spots, not just load up on a single point. Pour slowly. Try not to splash which would cause a mess and air bubbles into the mix. Once the bucket is close to empty, let it run out naturally, don’t scrape. There will be epoxy left in the bucket. Anything that may be unmixed is clinging to the sides. The first time is always difficult to see unused epoxy left in the bucket. Just relax and get accustomed to the process, after your fifth or sixth table it won’t bother you anymore.
Take a temperature reading across your rivers to get a baseline idea of the temperature. Next, run your finger along all the edges where your epoxy meets the slab. This helps minimize micro-bubbles on the edge and it really helps the bonding. If you prefer not to use a finger, you can always use a small paintbrush, just know this is going to be trash. Alternatively, if you find a silicone brush you can use it many times over. Grab your torch and start popping your micro-bubbles. Ensure you run the edge with your torch just like you did with your finger or brush. Take another temperature reading. You want your epoxy to stay below 120-degrees Fahrenheit or 48-degrees Celsius. Ideally, you want to be lower than that, but that’s really your alert temperature. If you have smaller holes or gouges in the wood, now is a good time to start filling them. Use that same brush to drop epoxy into that space or for larger voids, you can use the same plastic cup we checked the mixture with or a small plastic syringe. Anything will work, just move the epoxy into that space. If you are using box fans to control the temperature, this would be a good time to move them into position.
Keep an eye on those bubbles and keep popping while you monitor your epoxy temperature. You’ll end up repeating this process for each pour you make. I end up setting a timer for 60 minutes to go and check on the pour. If I have a spot that is producing a lot of micro-bubbles, the interval may be shorter. I do this until I’m comfortable with the product and the temperature has stabilized in the mid-80s F / high-20s, low-30s C.
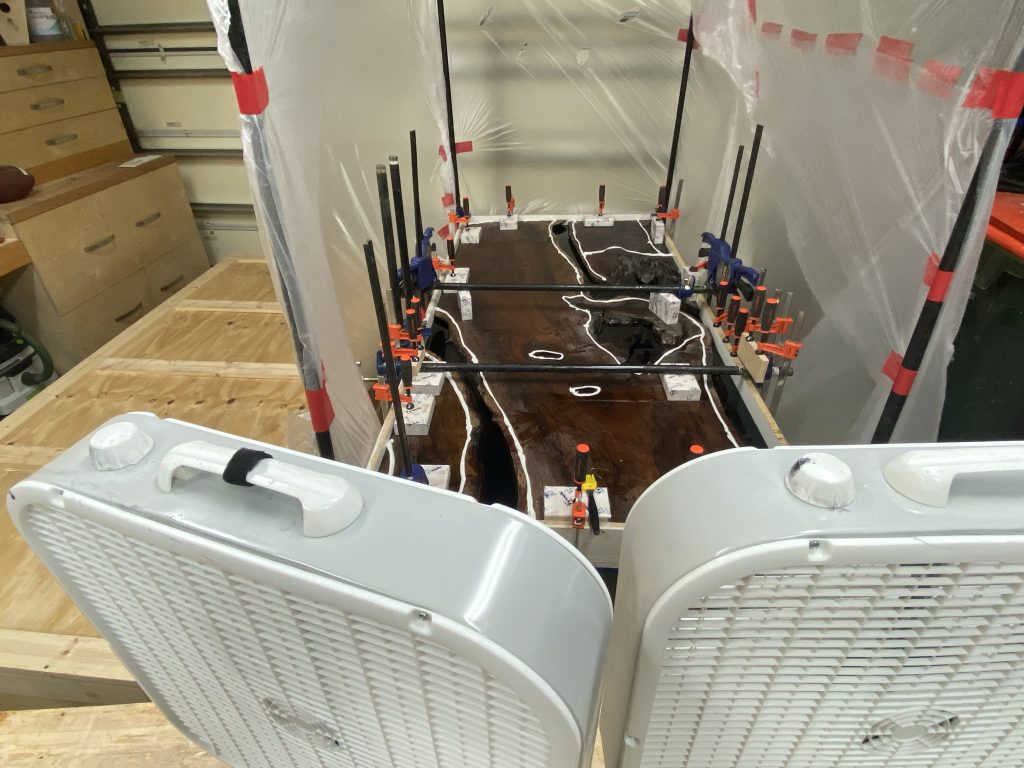
I work in a dust bowl and inevitably I am pouring epoxy under or around something that makes more dust. To mitigate this problem, I’ll use clamps and plastic drop cloth to create a protected area. It offers enough air movement around for the piece while providing protection from dust. The drawback is it does not have enough working space to make additional pours. On the flip side, since we’re using one-time-use plastic, I simply cut large enough holes to access the piece for additional pours and temperature control and tape them back closed with seam tape. It’s the same red tape I use to attach the plastic to the pipe clamps. I’m not completely sold on this setup yet, but it does get the job done.
And now we wait. Twenty-four to forty-eight hours between pours until we are at the desired depth. After that, it’s at least seventy-two hours but I give it a week before I start to de-mold and move on.
Keep an eye out for our next blog. I have a feeling things are going to get messy.

