At first glance, you would think this is pretty easy. To the uninitiated, you see the end product and understand the basics of how to get there; cut some wood, pour epoxy, sand a bit, attach the legs, and voilà, you have a table. Of course, there is a bit more to it than that. These builds do have a process, a standard set of procedures that can be broke down further into phases. During these phases, there are minor twists or modifications that need to be made that make each piece unique.
The first phase of any build is always unique and possesses its own challenges. It’s also the one that defines the tone of the entire build. What is the intended size, what wood are you using, and what will it look like in the end?
Of the entire progression from slab to finished product, I find this is the one step that is rushed by those just starting out. Take your time. Ask yourself; where’s the fire? Take a deep breath and simply relax. These tables are all about time and it will show on your finished product if you rush. This is something I still need to master, but have gotten much better at.

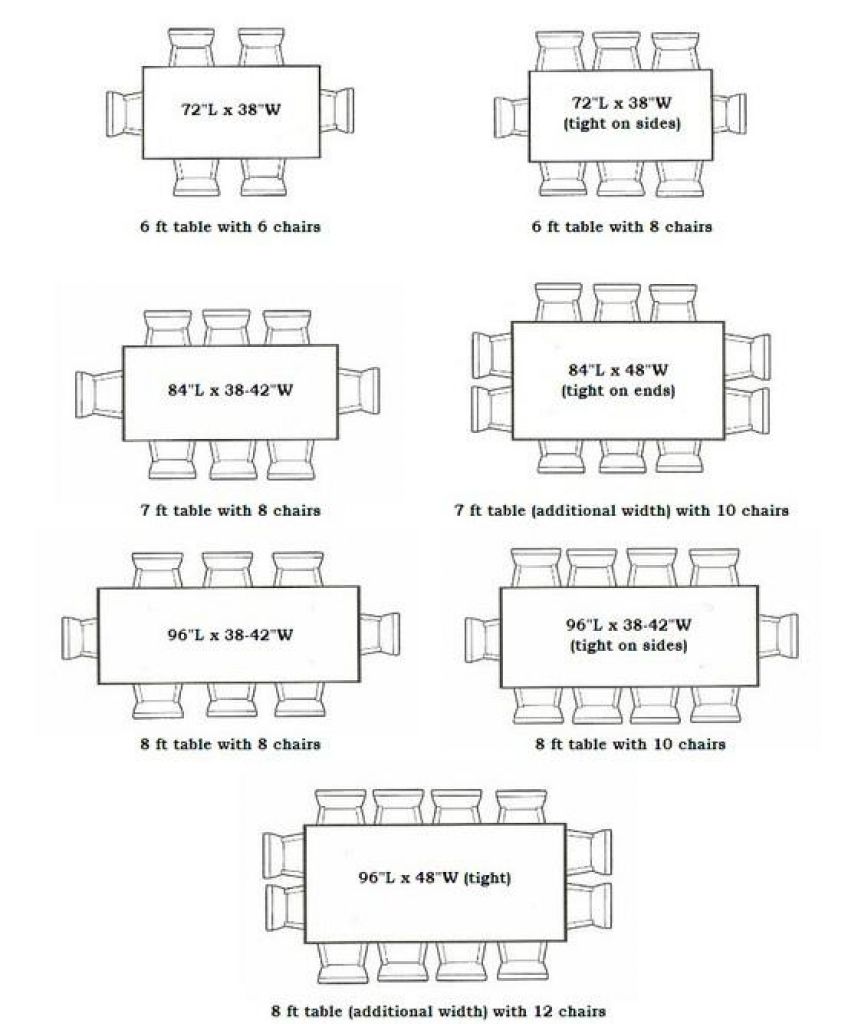
First figure out the size of your intended finish product. Entry or coffee tables can really be customized for space. Dining rooms, breakfast, or conference room tables typically have standard size ranges depending on the number of chairs you intend to put around it. I find myself using this chart to define the size of my tables.
Also, don’t forget to think about the overall height of the table, this will impact your target thickness. You can always customize your leg height for any tabletop thickness or intended finish height, however, the industry standard for leg height is 28” for tables and 16” “Bench” or coffee tables. If you intend for your table to have a 30.5”, you need to be looking for a slab at least 3” thick. You’ll lose roughly 3/8” or more in the planing/sanding process.
The type or species of wood is completely up to you. As the wise man once said; beauty is in the eye of the beholder. Personally, I tend to lean towards the walnut family. On the flip side of that, I have a sycamore build coming up soon that I’m jonesing to see how it turns out. In short, pick the species that speaks to you.
Once you have the size and type of wood you want to use, you will need to find your slabs. Expect to see in the next few weeks a deeper dive on where to get the wood and what to look for. There is way too much detail to discuss here, it needs its own post.
For this build the target size is 84” L, 38” W, and 30.5” final height. I’m paranoid I’ll miss the target size, so I add ¾” to each side (length & width) and add ¼” thickness to my measurements. Yes, it seems like a waste of material, until the one time your client is expecting a specific size and you end up coming in short. This is not a fun phone call to have nor is starting over from scratch with new slabs. It’s a rough couple of days. Simply plan it into your measurements from the beginning and you won’t have to worry about this costly mistake.
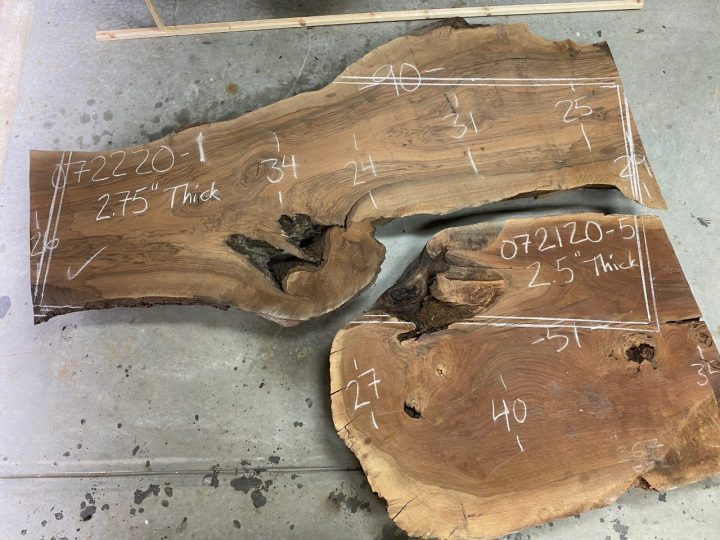
The layout should be part of the wood selection. Use different slabs. Try different angles. See what feels natural or well-suited to you. If you do not have enough spare offcuts lying around of a particular species with comparable shades, you may need to consider possibly getting multiple slabs from the same tree, so the shading matches. The last thing you want is to be applying your finish and the shading of multiple slabs is overly pronounced.

One thing to look for is your grain patterns versus the direction of the table. Especially when you are doing epoxy/resin river tables you have more flexibility in the direction of your grains since the voids between the live edge will always be filled. Sometimes running the grains horizontally looks okay, other times it does not. Typically, I’ll try to keep all the grains running with the long edge of the table. Another thing I learned by error was to ensure all the grains ran generally in the same direction. It’s one thing if you have many smaller pieces that you’re scattering the grain patterns, it’s something else entirely when all your pieces have the grain running in one direction except one piece that is running perpendicular.
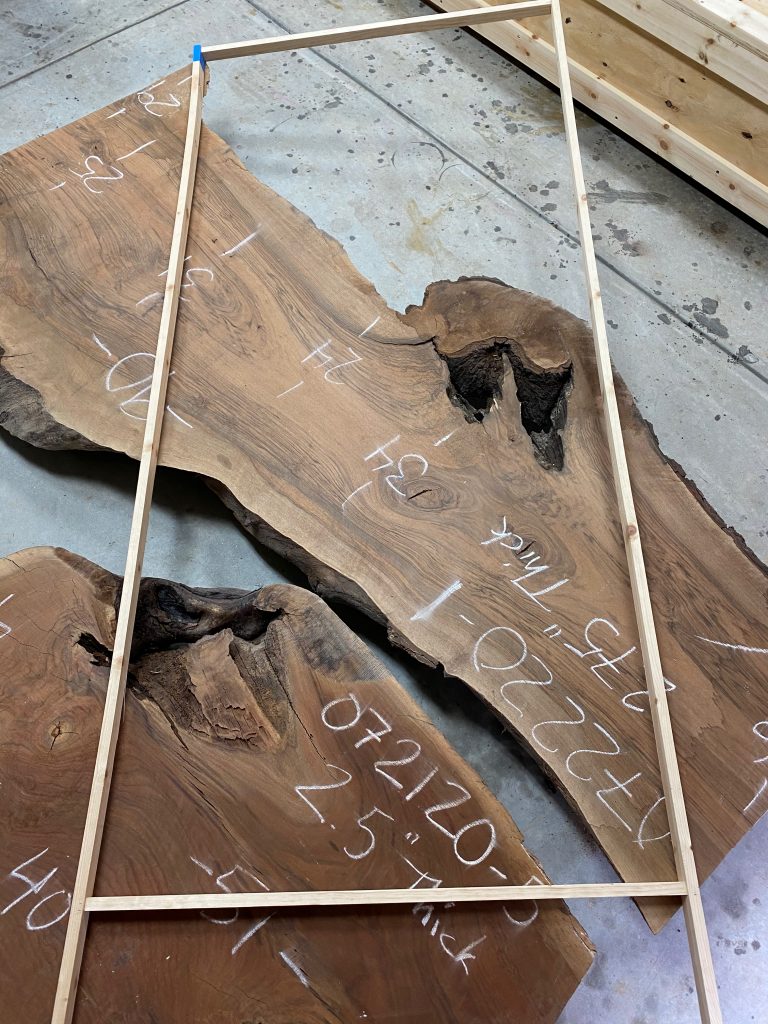
If you have some spare lumber lying around you can consider making a frame to the target size of your table. It doesn’t need to be pretty, it simply allows you to visualize the final product without having to squint or use a software product to move offcuts around. This has saved me a few times and allows you to interact with clients in real-time so they know exactly what to expect the piece to look like. I use anything that’s lying around the shop but target ¾” width. This allows the target measurements on the interior of the frame and the roughed target size on the outside of the frame. Simply trace your outer-frame and you have your cut lines.
Now that the layout is finalized, the real fun can begin. Stayed tuned for our next topic, all about sourcing slabs.

